
Use Salesforce Components
Salesforce components are what separate a Folio Document from a document that merely mentions Salesforce. Each one embeds live CRM data directly in the page — a pipeline board, a list of open cases, a record’s stage path — and keeps it current without anyone updating it by hand.
There are five:
| Component | What it shows | / shortcut |
|---|---|---|
| Status Bar | A record’s picklist path, as a clickable progress path | /sb |
| Record Preview | A highlights panel of key fields from one record | /rp |
| Related List | Child records under a parent record | /rl |
| Workbench | Records owned by a chosen set of users, groups, or queues | /wb |
| Kanban Board | Records in picklist lanes | /kb |

Two ways to insert one
From the @ menu, starting with a record. Type @, search for and select a record, then choose the component. The record you picked becomes the component’s anchor. See Insert Mentions with @.
From the / menu, starting with a position. Type / and choose the component — or its shortcut, /rl for a Related List. You’ll pick the record afterward. See Formatting Documents.
Use whichever matches how you’re thinking. If you’re writing about a specific Opportunity and want its stage path, @ is faster. If you’re building out a page structure and know a board goes here, / is.
Workbench is the exception — it’s /-only. A Workbench isn’t anchored to an initiating record; it shows records owned by a set of people. There’s nothing for an @ mention of a specific record to supply, so it can only be inserted from the / menu with /wb.
Status Bar
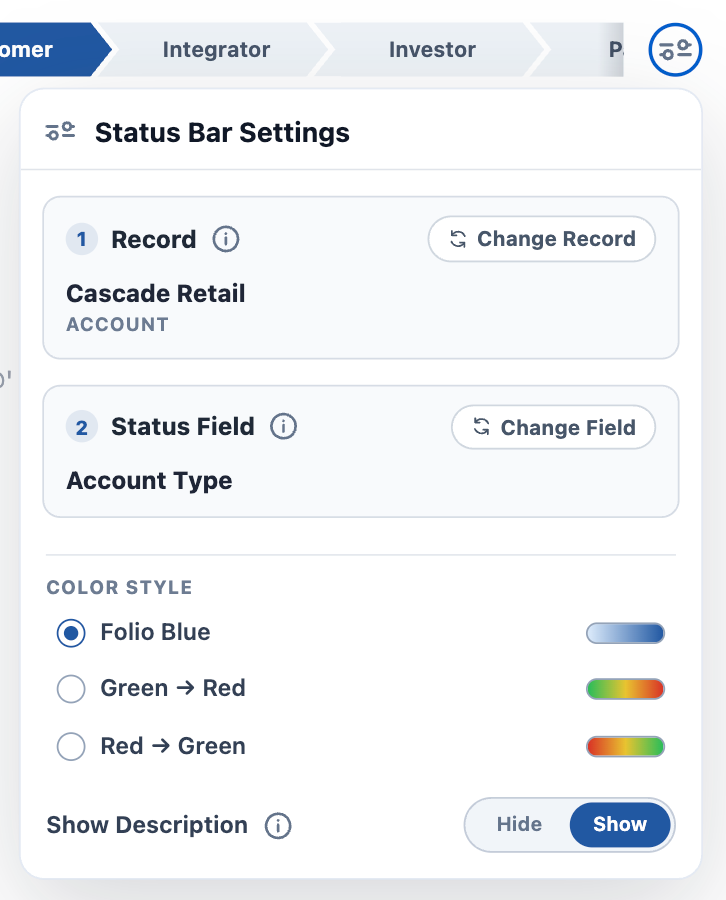
A Status Bar renders a record’s picklist path — an Opportunity’s Stage, a Case’s Status — as a clickable progress path inside the Document.
Placed near the top of a plan, it shows the reader the current state of the record before they read the body.
Field types. Status Bars work with picklist, number, currency, and percent fields only, and only those your admin has made linkable.
Editing. With write-back enabled, you can advance the status straight from the Document — click the stage you want and the record updates in Salesforce.
Insert with: @ → pick a record → Status Bar → pick the field. Or /sb.

Record Preview
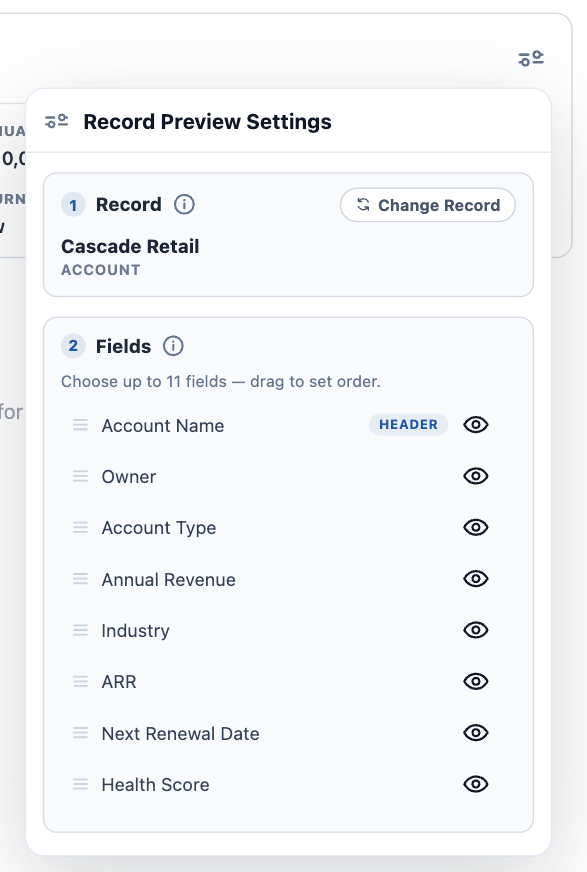
A Record Preview embeds a highlights panel for a single record — its key fields laid out as a compact card.
Where a Status Bar shows a record’s progress, a Record Preview shows its key values. Use it when a reader needs the details of a record without leaving the Document.
Fields shown are controlled by your admin through Choose Linkable Fields.
Editing. Fields with write-back enabled can be edited inline from the preview.
Insert with: @ → pick a record → Record Preview. Or /rp.

Related List
A Related List embeds a live, filterable list of child records under a parent record — all Open Opportunities under this Account, all Cases on this Contact.
Configuration. Four buttons sit in the upper right of the Related List’s header, in this order: Grouping, Rollups, Filters, and Settings.

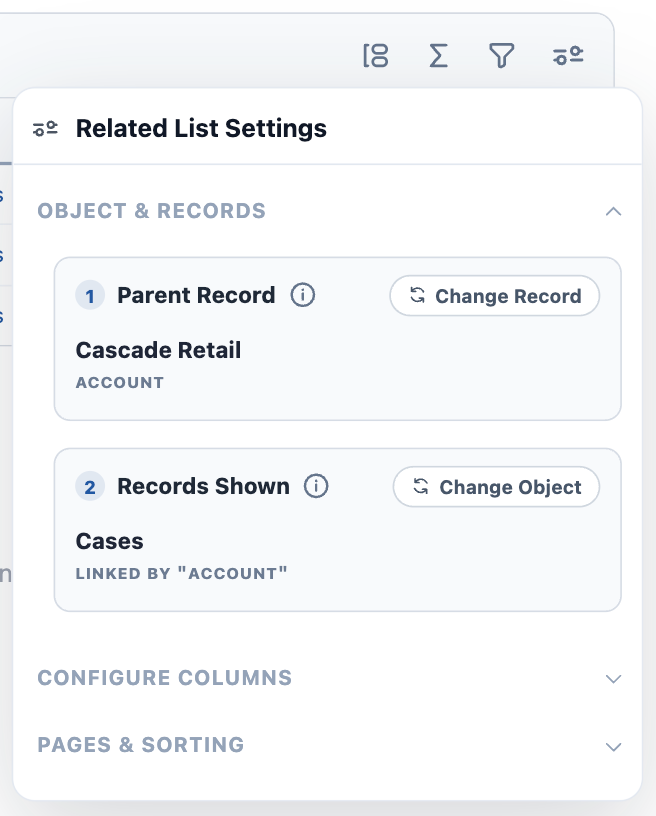
Settings — opens in three sections:
- Object & Records — the Parent Record and the Records Shown, naming the child object and the relationship linking it to the parent. Either can be changed here.
- Configure Columns — show and hide the displayed columns. Only fields your admin made linkable on the child object are available.
- Pages & Sorting — Records per page (5, 10, 15, or 20), the Sort column and Sort order, and whether to show or hide the header row.
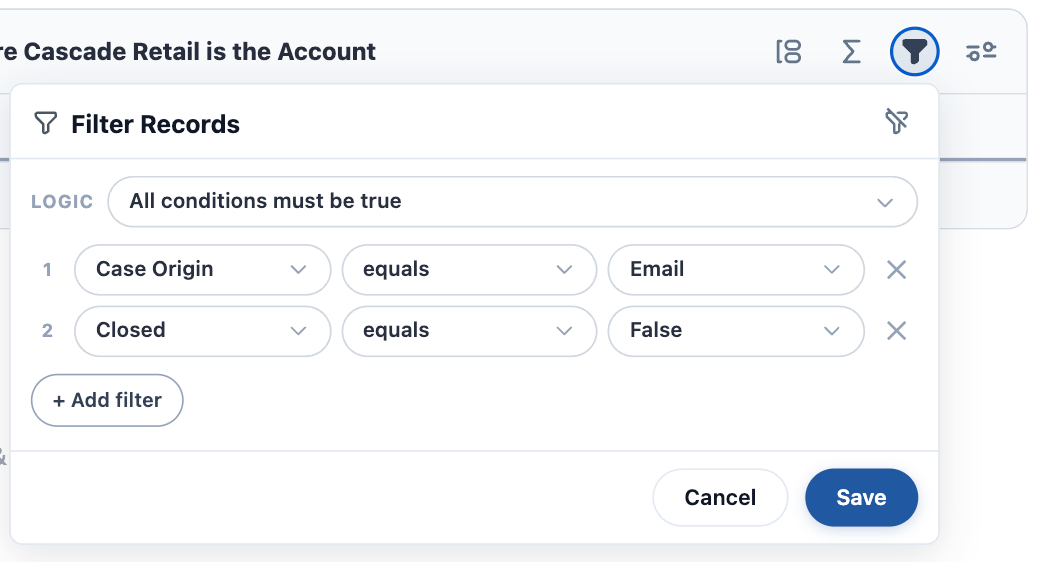
Filters — define up to 10 row filters controlling which child records appear. The Logic dropdown above the rows sets how they combine:
- All conditions must be true —
ANDacross every row. - Any condition must be true —
ORacross every row. - Custom logic — write your own expression using
(,), row numbers, and theAND/ORkeywords. It’s validated before you can save: every(needs a matching), every filter row you’ve defined must appear at least once, and every number must correspond to a row that exists.
Grouping and Rollups — set these up from the column itself. Click the 3-dots menu beside any column header and choose to create a new grouping or rollup on that column. Once one exists, manage it from the Grouping or Rollups button in the header: each panel lists what you’ve defined, lets you remove an entry or clear all, and carries its own display options — a Table style and a show/hide toggle for grouped Rows, or a show/hide toggle for the Row count on rollups.
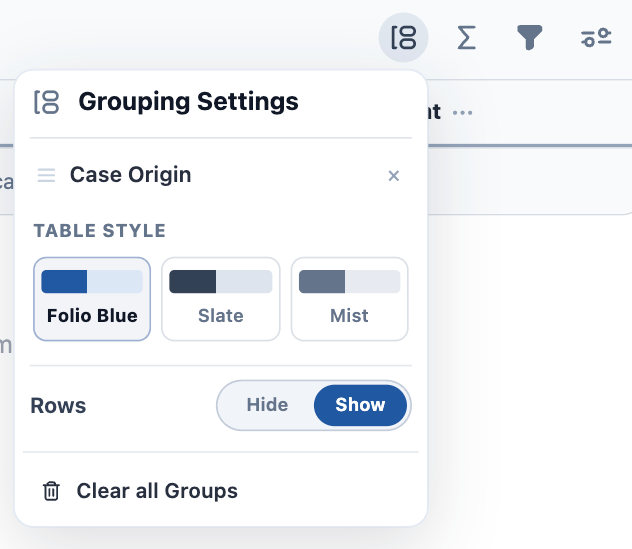
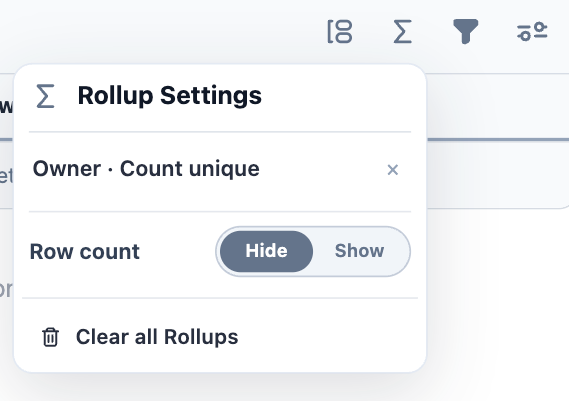
Every Related List is configured independently, so two lists of the same object in the same Document can show different columns.
Where the controls live. With the component’s header shown, its controls sit in that header. With the header hidden, use the node handle — it offers Filter Records, Related List Settings, and Show Header. The same applies to a Workbench, where the middle option reads Workbench Settings.
Editing. Columns backed by write-back-enabled fields can be edited inline, right in the list.
Both objects must be linkable. For a Related List of Cases under an Account, your admin must have enabled both Case and Account as Linkable Objects.
Insert with: @ → pick the parent record → Related List → pick the child relationship. Or /rl.
Workbench
A Workbench lists records owned by a chosen set of users, groups, or queues — not records under a parent.
A Related List answers “what’s attached to this record.” A Workbench answers “what does this person or team own.” Use it for a personal working doc, a team standup page, or a queue review.
Because it’s driven by ownership rather than a parent record, a Workbench needs no anchoring record at all — which is why it’s /-only, and why it works in a Template with no Source Object.
Everything else works like a Related List — the same table interface, the same four header buttons, and the same grouping, rollups, and filtering, configured exactly the same way.
What differs is how you choose the records. Under Settings, the Configure Object & Ownership section asks for three things in order:
- Object — which object the Workbench lists records from.
- Ownership Field — which field on that object determines ownership.
- Owners — the Users, Queues, or Public Groups to match against that field. Search for them and add as many as you need.

Insert with: /wb.
Kanban Board
A Kanban Board shows records in picklist lanes — a pipeline by stage, a support board by status. Dragging a card between lanes updates the record in Salesforce.
Drag and drop requires write-back on the lane field. Moving a tile writes a new value to the Lane Group Field, so that specific field must have write-back enabled. Without it the board is read-only: tiles display normally but can’t be dragged between lanes. See the two-gate rule for what has to be switched on.
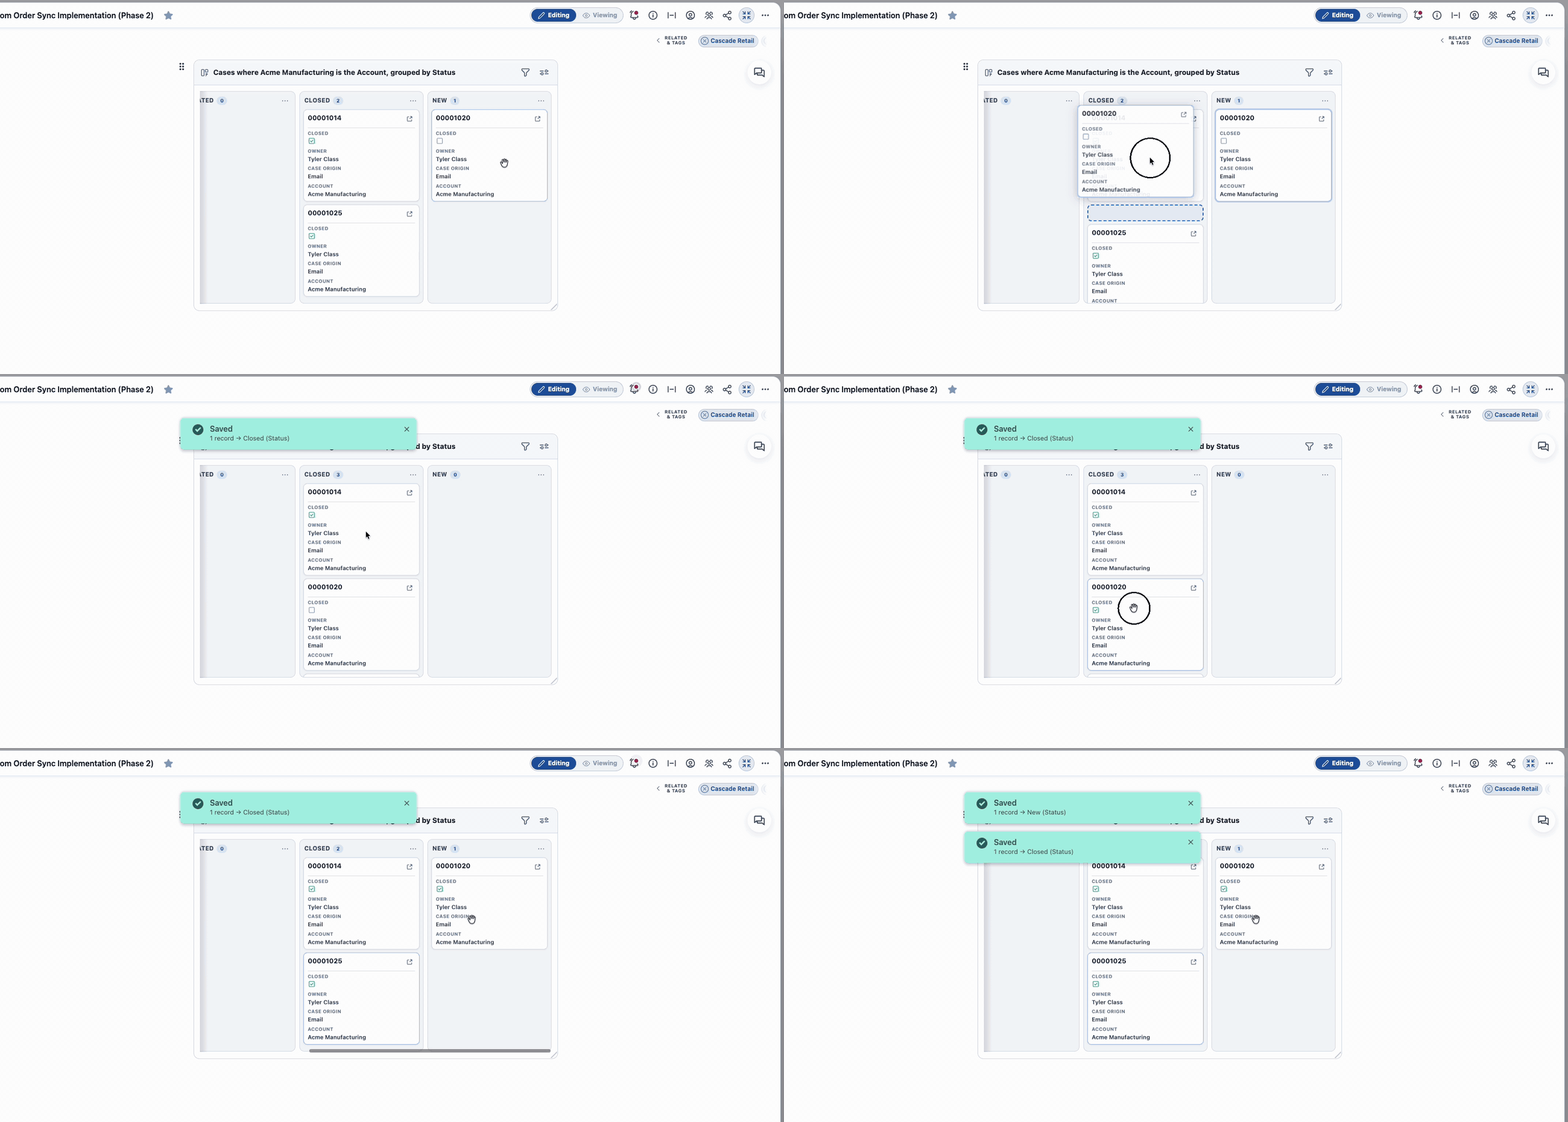
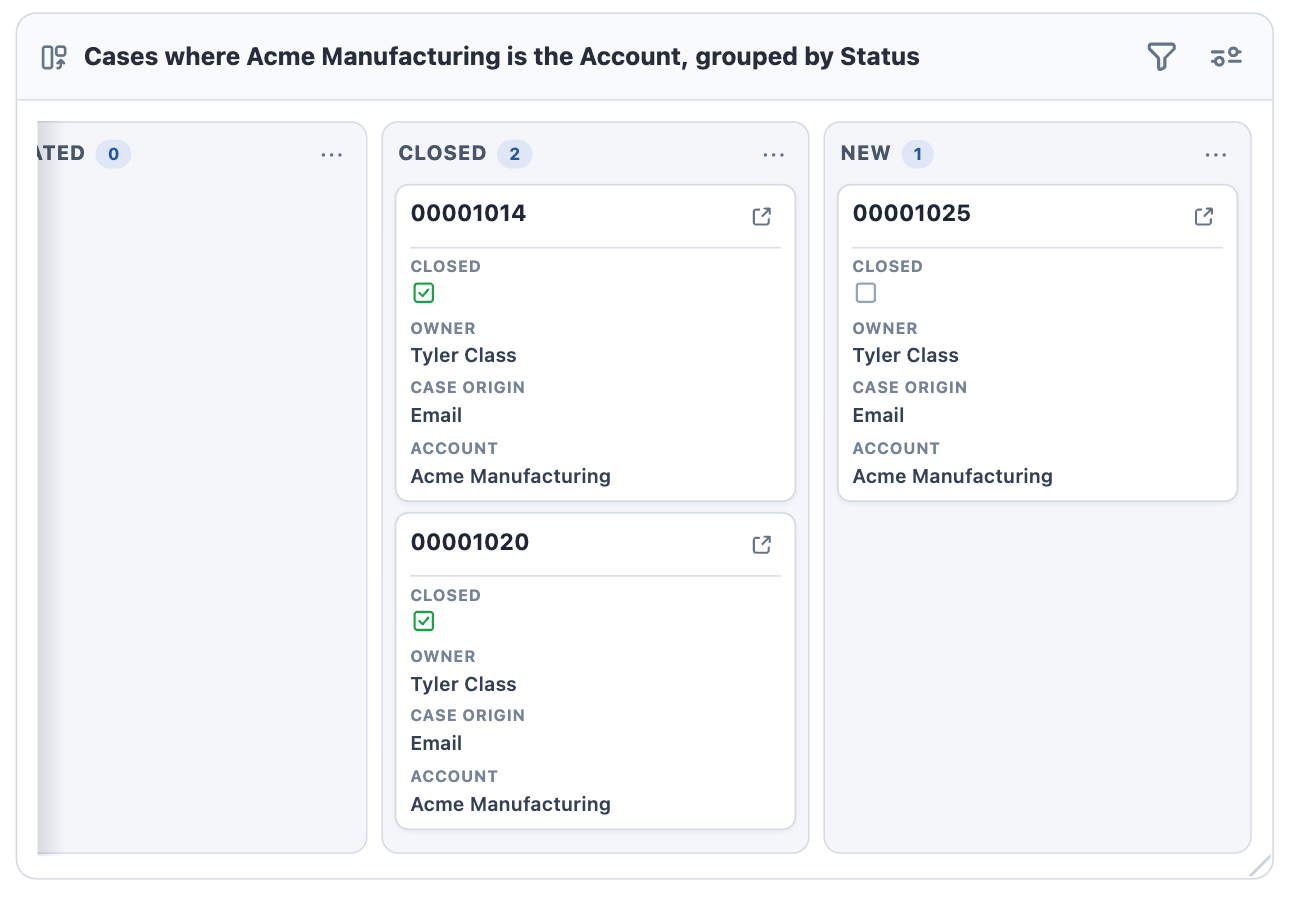
Two modes, set by the Record Viewing Mode toggle at the top of Board Settings, and the distinction matters:
- Parent Record mode — shows child records under a specific parent record. This is what you get when you insert from
@, with the record you picked as the parent. You then choose the Child Records object and the Lane Group Field that supplies the lanes. - Selected Users mode — shows records by owner, like a Workbench arranged into lanes. You choose the Object, the Ownership Field, the Owners to match against it, and the Lane Group Field. It needs no parent record, so it works in a Template with no Source Object.
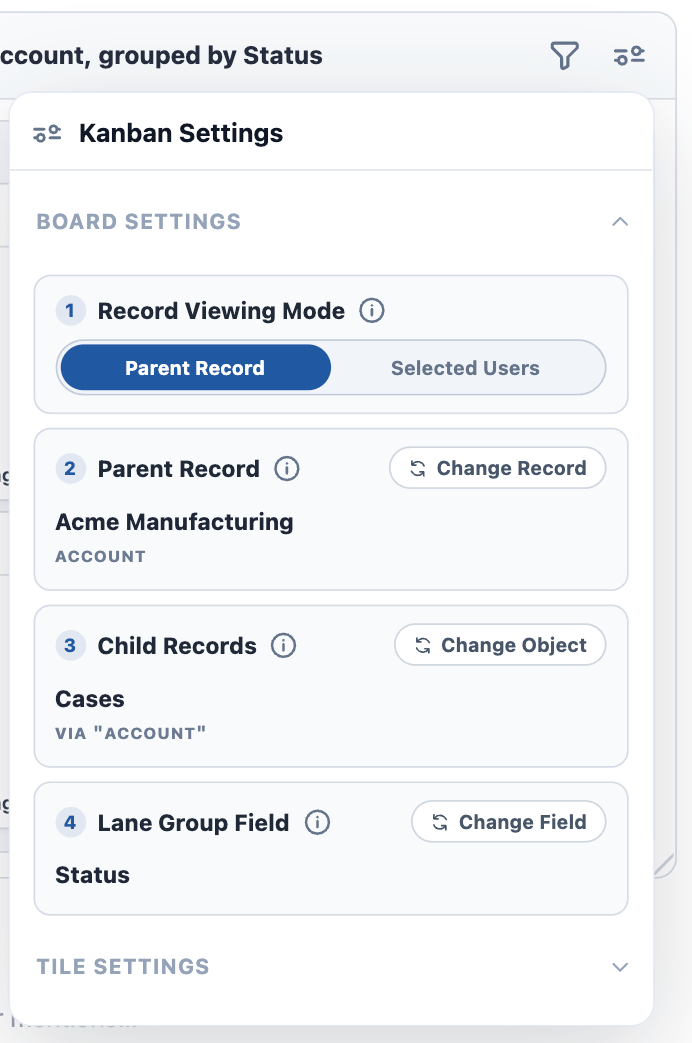
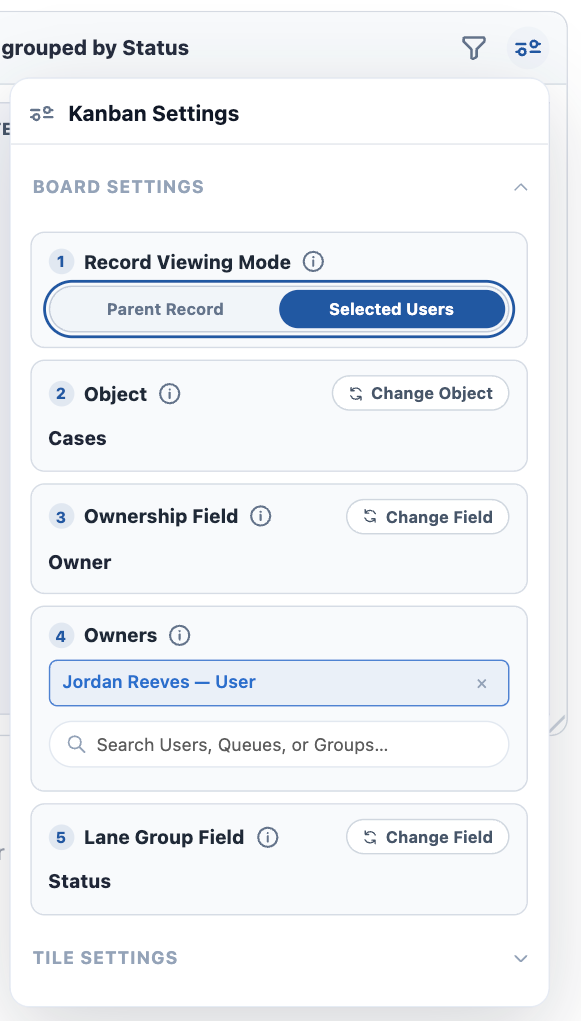
A Tile Settings section beneath Board Settings controls which fields appear on each card.
Insert with: @ → pick the parent record → Kanban Board → pick the child object and the picklist field for the lanes. Or /kb.
Record types are handled for you
Salesforce record types often restrict which picklist values are available — a Standard Opportunity and an Enterprise Opportunity may each allow a different set of stages. The Kanban Board handles this automatically, with no configuration.
When the board returns records of more than one record type, and those record types enable different picklist values on the lane field, the board splits into a separate group of lanes per record type. Each group shows only the values its own record type allows, so you never see a lane a given record couldn’t legitimately move into.
Dragging respects the split. A tile can only be dropped into a lane belonging to its own record type. You can’t drag an Enterprise Opportunity into a lane that exists only for Standard Opportunities, because that value isn’t valid for that record — so the drop is simply not allowed.
If every record on the board shares a record type, or the record types all enable the same values on the lane field, the board renders as a single set of lanes and none of this is visible.
What your admin controls
Components can only display what an administrator has made available:
- Linkable Objects determine which objects a component can point at. For a component spanning two objects — a Related List, a Kanban in Parent Record mode — both parent and child must be enabled.
- Linkable Fields determine which fields can appear as columns, tile fields, preview fields, or status fields.
- Write-back determines whether you can edit from inside the Document. It needs two gates open: the org-wide setting and the per-field one. With either closed, the component still displays data but is read-only.
Write-back never exceeds your Salesforce access. If you can’t edit a field on a record in Salesforce, you can’t edit it from a Document either.
If a component you want isn’t offered, that’s configuration rather than a bug — ask your admin.
Staying current
Components re-read Salesforce whenever the page loads, so a refresh always shows current data.
Beyond that, changes can stream in live while you’re reading. That works automatically for Account, Contact, Opportunity, and Case; for other objects an admin sets it up per object. See Set up Real-Time Updates.
Components in Templates
Admins can build components into Templates, so a new Document arrives with its boards and lists already pointed at the right records. You can reconfigure them afterward — change columns, adjust filters — without affecting the Template or anyone else’s Document.
Related: Insert Mentions with @ · Formatting Documents · Using the Folio Document Editor · Create Documents from Templates
View this page as Markdown — for LLMs and plain-text tools.