
Browse the Folio Docs home page
The Folio Docs home page is a Lightning app page that gives users a single place to search, filter, and manage every Document they have access to in the org. Open it by searching for Folio Docs in the App Launcher (the 9-dots menu in the upper-left of any page in Salesforce), or pin the Folio Docs tab to your navigation bar (see Add Folio Docs to the Navigation Bar).
If you don’t see the Folio Docs tab on the navigation bar of the apps you use most, ask your admin to add it and share the Add Folio Docs to the Navigation Bar page with them — it walks them through the setup.
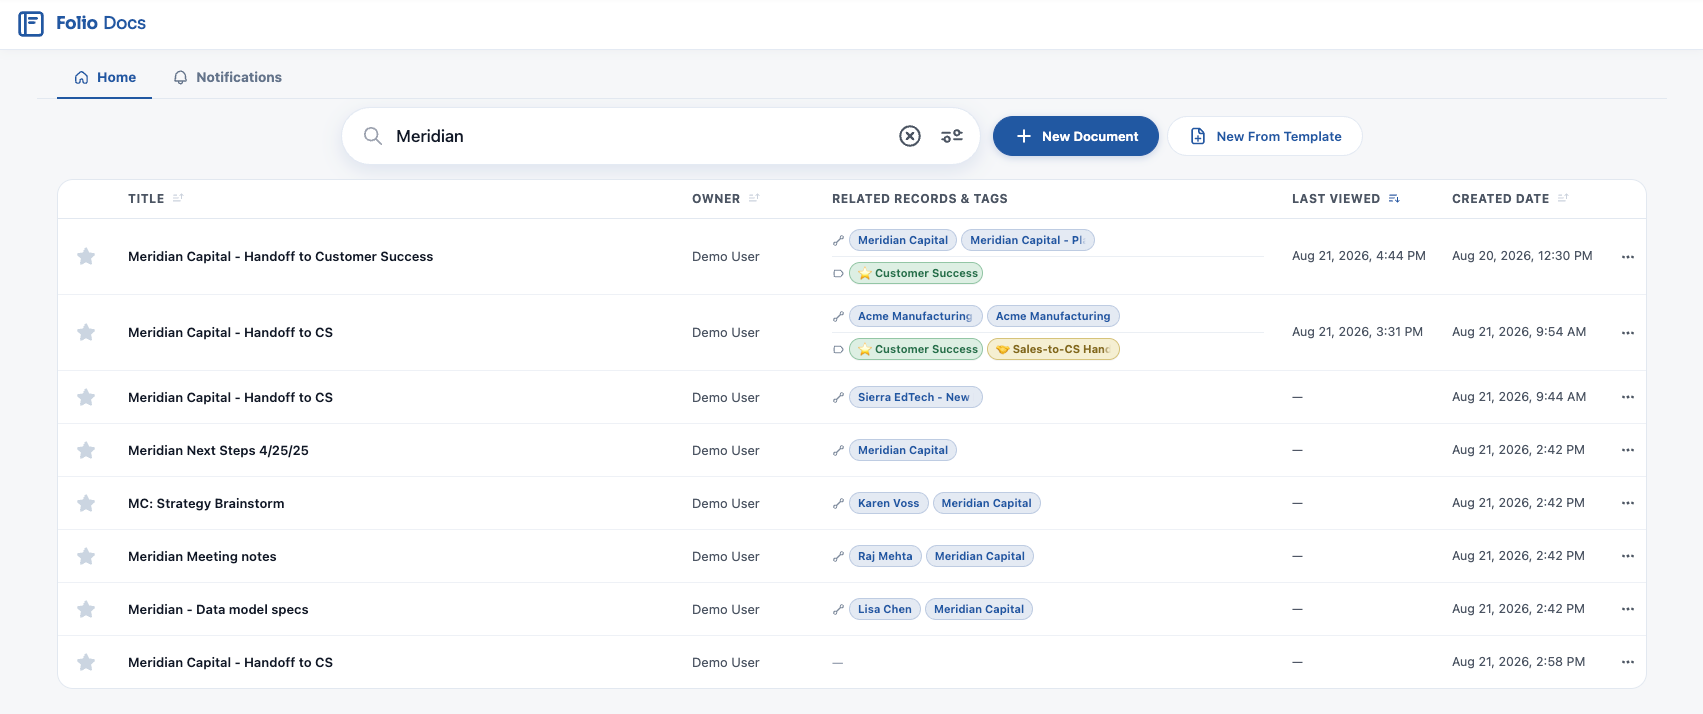
Global search
A single search bar across the top of the Folio Docs home page runs global search across all Documents that you have access to. Search matches against:
- Title: Document titles
- Contents: body content of every Document
- Tags: any Tags applied
- Related record names: names of any Salesforce records linked to a Document
Results narrow as you type, and the × in the search bar clears the term to bring the full table back.
Advanced filters
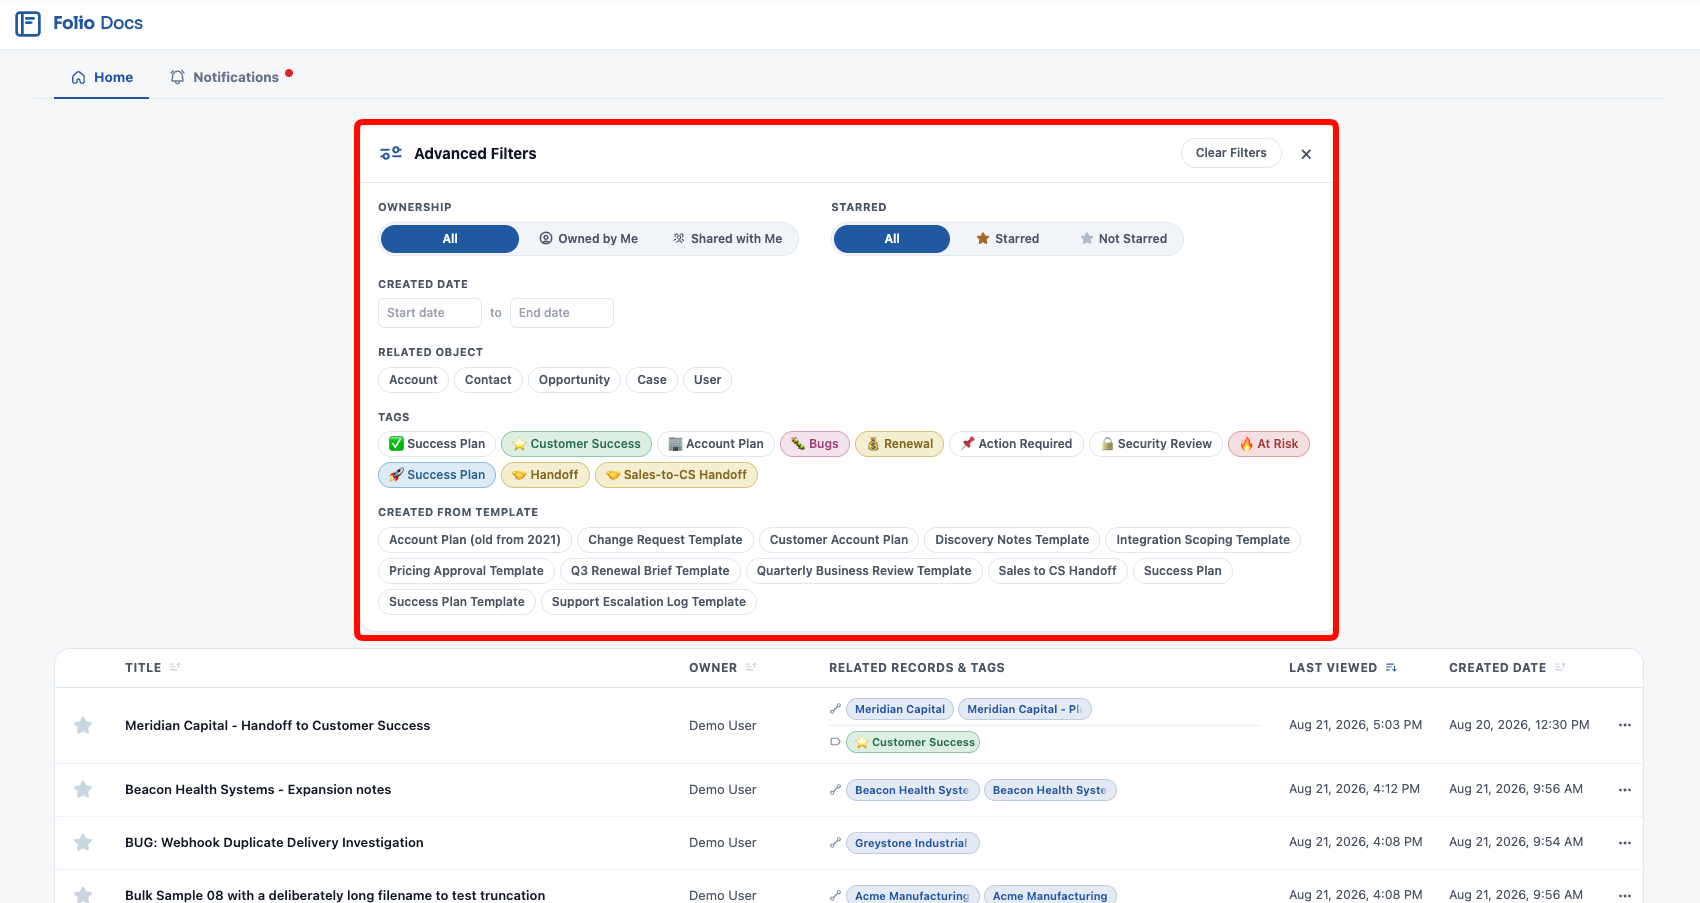
Open the filter panel from the icon at the right end of the search bar, and use advanced filters to narrow the table further:
- Ownership: All, Owned by me, or Shared with me.
- Starred / Not starred: filter to only your starred Documents, or only the ones you have not starred.
- Created date: filter to a start/end date range.
- Related object: show all Documents linked to any record of the selected object(s).
- Tags: show all Documents related to one of the selected Tags.
- Created from Template: show all Documents instantiated from the selected Template(s).
Only the objects, Tags, and Templates actually in use appear as options, so the panel reflects your org rather than a fixed list. Filters combine, and Clear Filters resets them all at once.
Sorting
The table sorts by Last viewed, newest first by default, so your most recent work is waiting at the top when you arrive.
Click any column header to sort by that column instead. Once you do, a Reset to default option appears — click it to go straight back to Last viewed, newest first, without hunting for the original column.
Creating Documents
To the right of the search bar are two buttons for creating new content directly from the Folio Docs home page:
- New Document — creates a new blank Document.
- New from Template — creates a new Document from one of the Templates configured in your org. See Create Documents from Templates for the full walkthrough.
When a Document is created from a Lightning record page (via the embedded Folio Document Editor), it is auto-linked to that parent record. When you create a Document from the Folio Docs home page, however, it is not linked to any record by default — the Folio Docs home page isn’t tied to a specific record, so it has nothing to auto-link to. To link it, either use an @-mention inside the Document body to reference a record, or open the Related & Tags popout and add record links from there.
Acting on a row
Each row in the Folio Docs home page table represents a Document.
A blue dot on a row means the Document has changed since you last viewed it. It’s not a notification — notifications use red dots — just a heads-up that there’s something new in the Document. Opening the Document clears it.
From the table you can:
- Star / Unstar directly from the row: clicking the star toggles your personal star on that item.
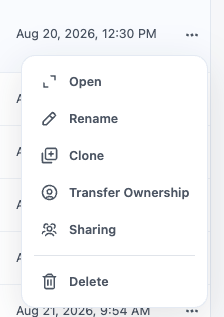
- Use the 3-dots menu on the right edge of the row to:
- Open the Document
- Rename
- Clone
- Transfer ownership (only available to the owner or to admins)
- Sharing
- Delete — in most orgs this archives the Document rather than destroying it, and an admin can restore it if you change your mind
Clicking on a row in the table opens the Document in a popout directly from the Folio Docs home page.
Notifications
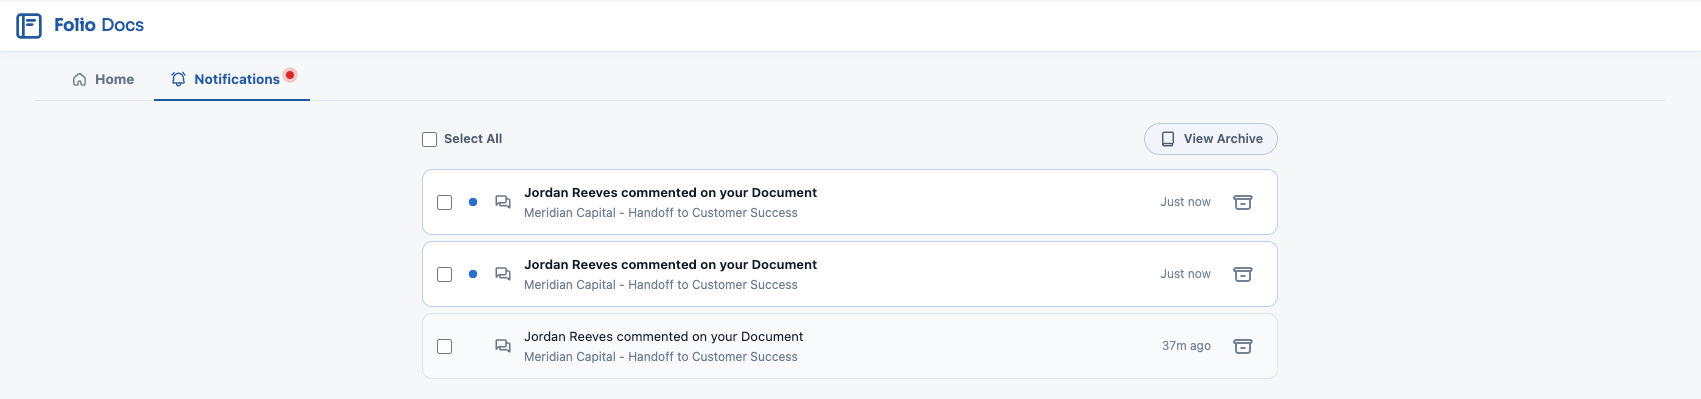
The Notifications tab on the Folio Docs home page is your org-wide view of everything involving you across every Document you have access to.
- A red dot on the tab means you have unread notifications.
- Click the tab to open your list.
- Read and unread are clearly distinguished, and you can mark one or several at a time as read or unread.
- Archive notifications to move them out of the list entirely. Archived items live under View archive, and can be pulled back out if you need them.
Clicking a notification takes you where it happened. A notification about being @-mentioned in a Document body opens the Document. A notification about comment activity opens that specific comment inside the Document.
It’s the same notification in two places. Anything unread here also appears on the bell icon when you open the linked Document. Opening it in either location marks it read in both — and viewing the comment a notification points to clears it everywhere at once: the red dot on the comment, the bell’s, and the notification here.
Notifications are grouped by Document
Every notification is grouped under the Document it belongs to, which makes activity on a busy Document easier to manage. Each group has a header showing the Document and a count — total and unread — and clicking that header expands or collapses the group.
Comment notifications show a preview of the comment, so you can see what was said without opening the Document.
Acting on a single notification
Each row carries its own controls on the right edge:
- The checkmark marks that notification read. It appears on unread rows only — once a notification is read, there’s nothing left to mark.
- The box icon, immediately to its left, archives the notification straight away, with no selection step. In the archive view the same button puts it back.
Clicking the row itself opens whatever the notification is about.
Acting on several at once
Every row and every group header has a checkbox on the left. Tick any combination, then use the buttons that appear at the top of the tab to Mark as Read, Mark as Unread, or Archive everything selected at once. Unselect clears the selection.
Selection works at two scopes:
| Control | Acts on |
|---|---|
| Select All at the top | Every notification in the list |
| The checkbox in a group header | Only the notifications for that one Document |
Ticking a group header’s checkbox is the quick way to clear out a Document that has generated a lot of activity. A count beside the buttons shows how many are currently selected.
Filtering by status
The funnel button beside Select All narrows the list to Unread only or Read only, or back to All. The funnel fills in while a filter is active, so a short list is never mistaken for an empty one.
Filtering pairs with selection: narrow to Unread only, hit Select All, and mark the whole backlog read in one go.
Email digest settings
The Notification Settings gear at the top right of the tab controls how often Folio emails you your unread notifications — Every hour (the default), Twice daily, Once daily, or Off. See Email digests for what the email contains.
For the full list of what triggers a notification, see Act on Notifications.
The expanded view: contextual sidebar from the Folio Docs home page
When a Document is open in its expanded view from the Folio Docs home page, the Documents that appear in the left sidebar are all other Documents related to any of the records that the initially opened Document is also related to.
This shows you a network of contextual records right where you need to see them. The Document you clicked first becomes the anchor, and the sidebar pulls in every related Document that shares any linked record with it. See Using the Folio Document Editor for more on how this view behaves.
Related: What is Folio Docs? · Using the Document Editor · Collaborate with Comments · Create Documents from Templates
View this page as Markdown — for LLMs and plain-text tools.